Jourpartner - webportal för hantverkartjänster
Koppla in en Taklampa

- Jourpartner
- Koppla in en Taklampa
- Uppdaterad 25 March 2024
Guide: How to Install a Ceiling Light in 5 Simple Steps
1.Safety Preparations: Turning Off the Power
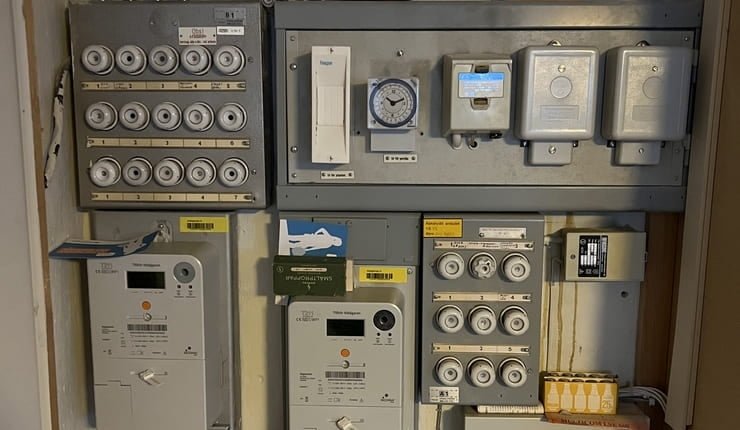
Before you start installing your ceiling light, it’s important to ensure that the power is completely turned off to avoid accidents. Turn off the power by removing the correct fuse from the fuse box, not just by turning off the light with the switch. It’s a good idea to use a multimeter to ensure you’ve removed the right fuse and that there is no power in the wires.
2. Install the Light Fixture Bracket
The choice of mounting bracket varies depending on the type of light you have. Whether the bracket is attached directly to the junction box or needs to be screwed into the ceiling, it is important to pre-drill holes if necessary, especially in harder materials like concrete. Don’t forget to use anchors to ensure the screws hold properly depending on the material.
3. Connect the Wires
Once the mounting bracket is in place, the next step is to connect the light’s wires. Carefully strip a small section of insulation from the wires (about 11mm) to expose the copper wires. Then connect the black/brown (L) and blue (N) wires to the marked locations on the light socket. If there is a yellow-green (PE) wire, it should be connected to the ground connection (yellow-green) – Grounding should only be yellow-green in new installations; in some cases, it is red in older installations. Always double-check the wiring diagram for your specific light.
4. Attach the Light
With both the bracket and wires ready, it’s time to attach the light fixture. Hang the light on the bracket and secure it with the included screws. Make sure everything is firmly in place before moving on to the next step.
5. Turn On the Power and Enjoy Your Light
The final step is to turn on the power and see your new ceiling light shine. Install an appropriate light bulb, switch on the power, and enjoy the results of your work. Installing a ceiling light is a simple project that makes a big difference in your home!
If you encounter issues with the circuit breaker tripping, you most likely have wired something incorrectly.
Behöver du ett proffs? Om du känner dig osäker på att utföra något själv inom el, kontakta en behörig elektriker!


Important Points to Consider When Replacing a Ceiling Light or Installing an LED Light with Driver
Choosing the Right Driver for Your LED Light
When installing an LED ceiling light that requires a driver, it’s essential to follow the manufacturer’s instructions. Proper wiring not only ensures the light’s functionality but also your safety.
Wiring the Ceiling Light: Using Terminal Blocks or Wago Connectors
To simplify the wiring of your ceiling light, you can use either traditional terminal blocks or modern Wago connectors. These help connect the electrical wires properly without the need for soldering. Remember to install the brown and blue (live and neutral) wires on the sides and the ground wire in the center for optimal safety and functionality.
Easy Wiring with Quick Connectors
Many contemporary lights come with quick connectors for easy wiring. This method only requires you to push the electrical wires into place after stripping a section of the wire insulation, making the connection quick and efficient.
Wire Colors – What Do They Represent?
It is important to know what the different colors of electrical wires represent:
- Brown Wire (L): Live conductor, usually brown but can also be black.
- Blue Wire (N): Neutral conductor, but can also be white.
- Yellow/Green Wire (PE): Ground conductor, enhances safety by directing any fault current away.
In older installations, other color combinations might be present, so it is critical to always check and verify before starting the wiring.
Need Professional Help? Contact Our Electrician
Summary
When replacing a ceiling light or installing a new LED light with a driver, it’s crucial to carefully follow these steps and guidelines for a safe and effective installation. Using Wago connectors or terminal blocks for wiring, along with a correct understanding of wire color coding, ensures your lighting remains effective. Keeping these aspects in mind not only improves the function of your ceiling light but also maintains the highest safety standards.
Wiring a Ceiling Socket for a Ceiling Light: A Guide to Lamp Sockets, Light Outlets, and the DCL System
Ceiling Socket, Also Known as Lamp Socket, Light Outlet, Plug, and Lamp Plug
Ceiling sockets, also known as lamp sockets, light outlets, plugs, and lamp plugs, are crucial components for connecting a ceiling light. Today’s market offers a wide range of light outlets and lamp plugs, including both earthed and unearthed options for wall and ceiling sockets. In addition to traditional light outlets, DCL (Direct Connect Lighting) outlets and DCL plugs are also available, designed to meet the latest EU standard, “Devices for Connection of Luminaires” (DCL), which ensures safe and standardized lighting connections.
DCL Standard Requirements
With the introduction of DCL standards, it is now mandatory for all new installations to use DCL outlets. This means that older lamps not directly compatible with the DCL system will require an adapter, such as a lamp plug adapter with an E27 socket, or an upgrade to DCL-compatible plugs.
Choosing the Right Lamp Socket
It is important to select the correct type of lamp socket based on the protection class of your ceiling light. Protection Class I indicates earthed products, while Class II represents unearthed products. Technically, it is possible to connect an earthed lamp to an unearthed socket if the product manufacturer approves this, but it is strongly recommended that all connections and upgrades to earthed systems be performed by a qualified electrician to avoid risks. Unearthed sockets require double-insulated fixtures or ceiling lights.
Upgrading to Earthed Systems
When switching to earthed systems, including earthed ceiling sockets and earthed wall sockets, it is critical to also upgrade all sockets in the room to earthed versions to prevent safety risks. This is particularly important in environments where earthed and unearthed sockets have previously been mixed.
Summary
Understanding the difference between earthed and unearthed sockets, the importance of the DCL system, and the necessity of following applicable standards and recommendations is crucial when installing or replacing ceiling lights. Adhering to these guidelines not only ensures a safe installation but also aligns with the latest standards and best practices for home lighting.
Wiring a Ceiling Socket for a Ceiling Light: A Guide to Lamp Sockets, Light Outlets, and the DCL System
Choosing the Right Lamp Socket: Earthed or Unearthed?
A common question among our customers is whether to choose an earthed or unearthed lamp socket. To simplify this decision, we present a guide based on different types of light outlets and their compatibility with earthed versus unearthed lamp sockets.
DCL Light Outlets – The Future of Ceiling Sockets
DCL light outlets, designed to be installed with an earth connection, offer the flexibility to use both earthed and unearthed lamp sockets. The choice between these depends on the protection class of your ceiling light. This standard ensures the highest safety levels and complies with the latest EU regulations.
Older Light Outlets – Earthed Options
For older earthed light outlets, both earthed and unearthed lamp sockets can be used, depending on your existing lighting’s protection class. It is crucial to consider the light’s protection class to ensure correct and safe connection.
Older Outlets – Unearthed Solutions
For homes with older unearthed outlets, we strongly recommend investing in Class II ceiling lights and choosing an unearthed lamp socket to maintain safety. If you’re unsure about which type of lamp socket is appropriate, it is always best to consult a professional.
Need Professional Help? Our On-Call Partner is Here for You
If you have questions or need assistance with lighting installation, Svenska Eljouren is ready to help. With a presence throughout Sweden, from Malmö in the south to Karlstad in the north, including major cities like Gothenburg and Stockholm, our qualified electricians are at your service. Whether you need DCL outlet installation or advice on choosing between earthed and unearthed lamp sockets, you can rely on us for the expertise and service you need.
By following these guidelines and seeking professional help if needed, you can ensure that your home is not only well-lit but also safe. Contact our On-Call Partner for more information and to book a qualified electrician who can guide you through the process of choosing and installing the right lamp socket for your home.
Vi erbjuder eljour dygnet runt och kan skicka ut en elektriker inom 1 timme!
Våra senaste artiklar
Byta Lysrör till LED
30 March 2024 Elektriker ArtiklarByta Elcentral
26 March 2024 Elektriker ArtiklarDelar av huset är utan ström
26 March 2024 Elektriker Artiklar


